Connecting to the Tracking Unit
There are 3 ways to connect to the tracking unit. Direct to phone/EUD, Bluetooth, and connection to the Nett Warrior hub.
-
Direct Wired to EUD: Connect NEON Tracking Unit to the EUD USB port using a USB on the go cable.
-
Bluetooth: NEON PT-MIL can be used with just an Android phone and a NEON Tracking Unit. See the tracking unit for additional information on the NEON tracking unit.
-
Full Nett Warrior Configuration: Connect NEON Tracking Unit to Pan 1, 2, or 3 on the Nett Warrior Hub using a micro USB cable to USB-A. A Star Pan adapter is then used to connect from USB-A to the NW hub. The tracking unit can then be secured to the vest and will be powered by the NW hub via the conformal battery.
Configuring Tracking Unit with ATAK PT-MIL
NEON PT-MIL works with “offline” authenticated tracking untis. If using an existing online tracking unit, you must login to your NEON subscription account. The login page can be accessed by opening the NEON Settings menu in ATAK.
The first time ATAK loads, users see the following screen prompt.
![]()
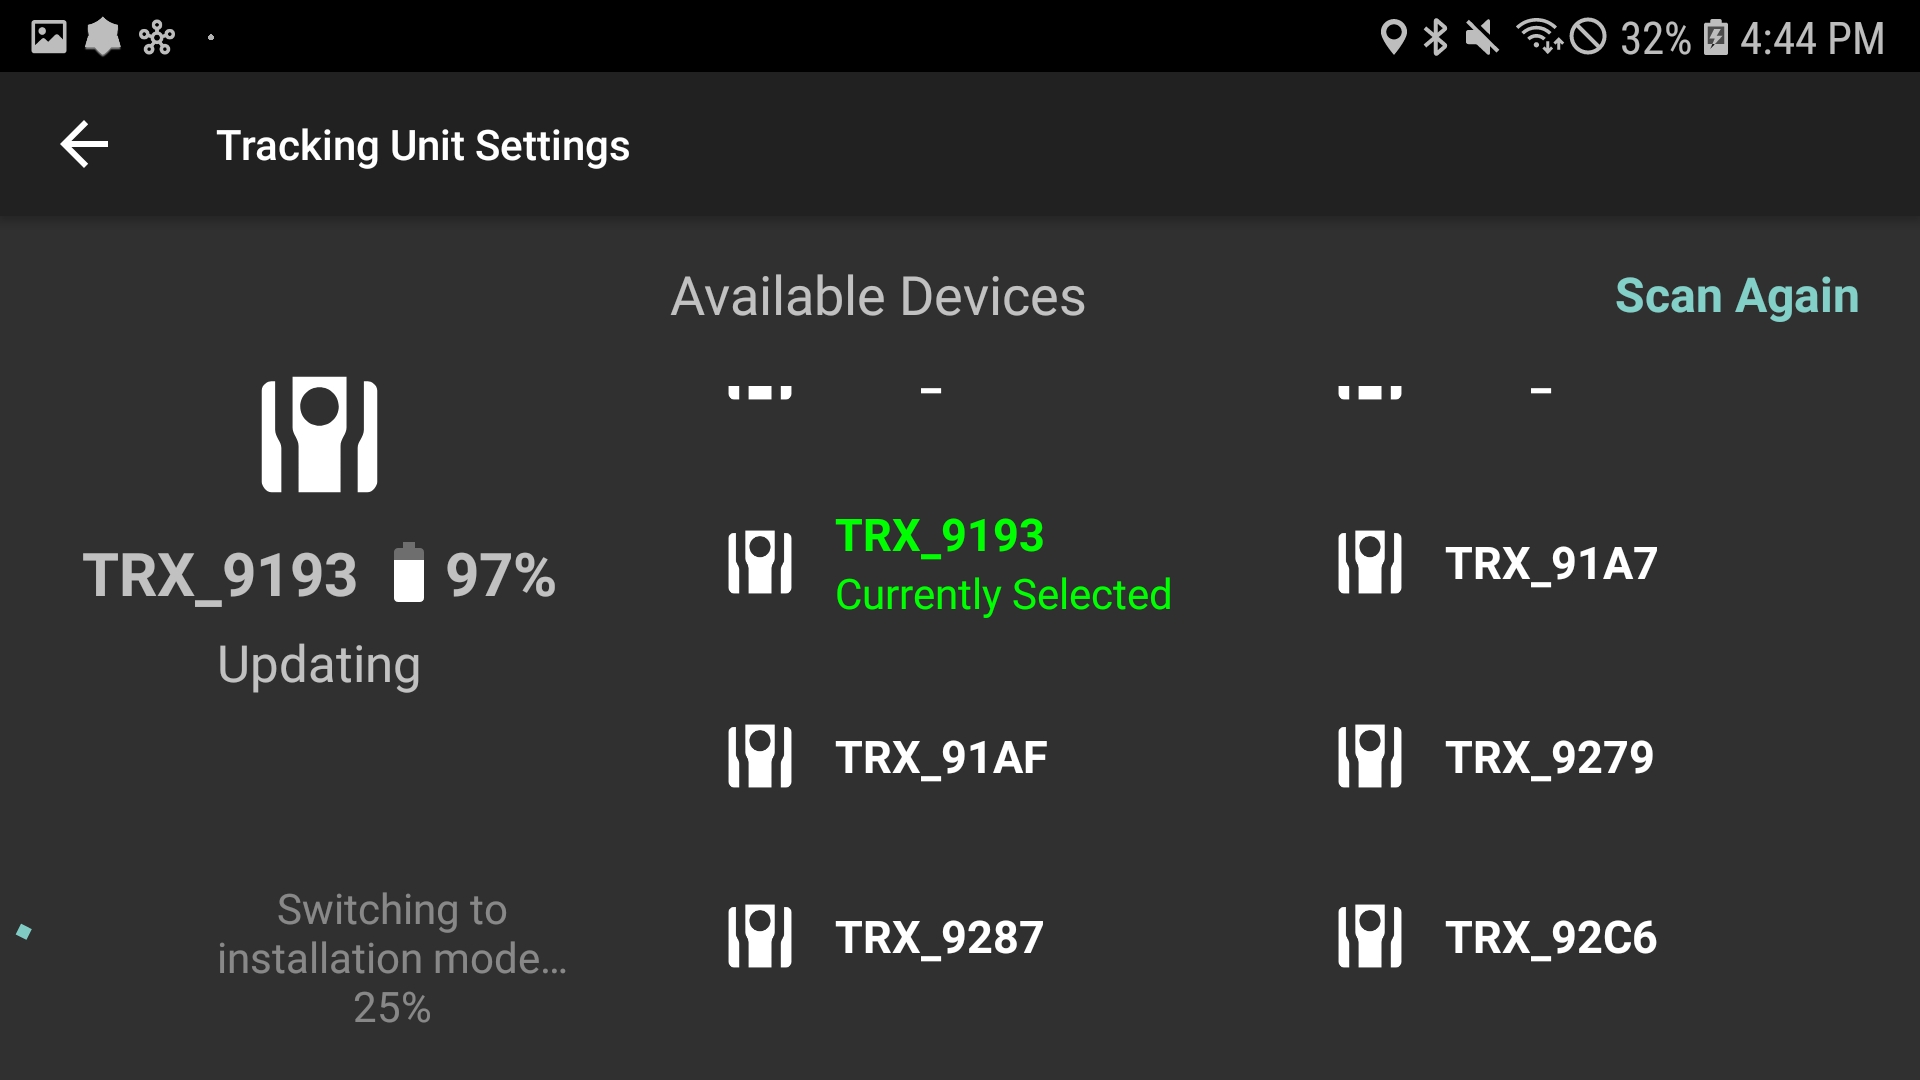
Users should tap on “Tap to Connect” or open the “NEON Settings” menu to connect the tracking unit, then, power on the Tracking Unit and tap the serial number to select it.
![]()
TRX recommends installing the latest firmware. Users should tap the blue box to update the tracking unit firmware.
Once the firmware on the tracking unit is updated, “Tracking” appears beneath the tracking unit icon.
![]()
Tap the back arrow to return to the NEON Settings page, then the main screen.
![]()
Your tracking unit is now connected.
If the tracking unit has not successfully authenticated, you may see “Unauthorized.” If that message appears beside the tracking unit’s device ID, you are using an online tracking unit and should login to your account.
