Signal Tray
The signal tray provides information about the state of signal mapping and the signals that are being received. It provides instructions for initialization and allows control to start and stop recording of signal map data.
Start and Stop
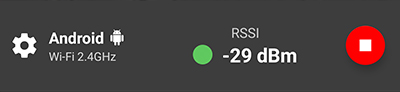
The user can control when signal map information is recorded using the start and stop buttons. In order to start mapping, there must be an accurate location and this can be achieved by initializing the location.
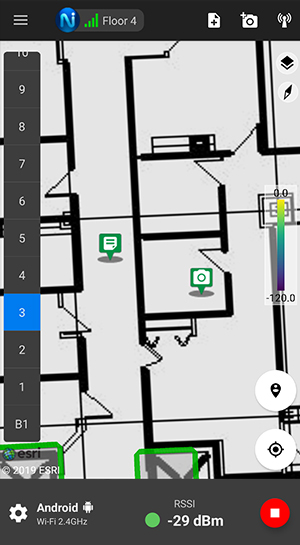
Once the play button is pressed to start recording, the signal tray will display signal filters on the left and signal measurement on the right. Clicking on the signal filters will allow users to change filters. Clicking on the signal measurement will allow users to bring up the signals list page.

The top toolbar will change depending on the user’s mapping status. While mapping, the top menu actions will change from “Upload Signal Maps” to “Take Note”, “Take Image”, and “Signal List”.
As signal mapping continues, the user may provide check-ins to correct their position and maintain a navigation lock.
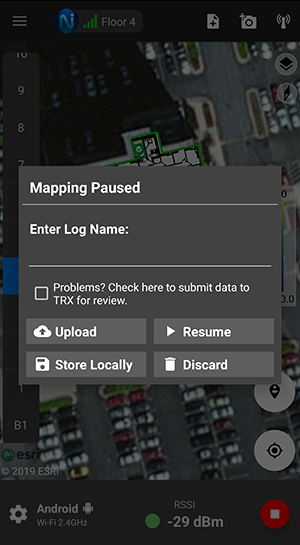
When the stop button is pressed, mapping is paused and the user has the option to provide a name, upload, resume, store, or discard. When the Signal Map is uploaded to the cloud, it becomes available to view in NEON Command.
Note: If the log is stored locally, then it can be retrieved by navigating to \phone\Neon\SignalMaps.
If there is a problem with tracking, check the box to submit data to TRX for review. This will send all of the necessary files to discover the cause of the problem. Someone from the TRX support team will reach out with further information.
Signals List
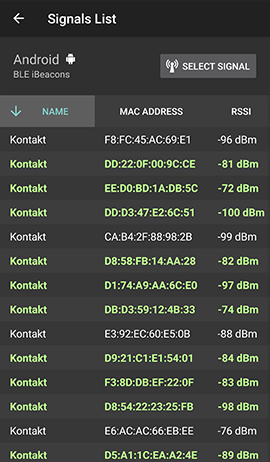
A list of signals can be viewed by clicking on the signal icon on the top bar or by clicking on the signal measurement in the signals tray at the bottom. This list shows all of the signals collected in the past 30 seconds. The signals that meet the signal filter requirements are displayed with green text. The type of signal displayed in the list can be chosen by clicking the “Select Signal” button. Signals that have a lot of associated information such as WiFi can be swiped left and right to view additional data.
Notes and Pics
Notes and pictures can be added to a Signal Map to add additional information about the test site by using the tools in the top bar. An icon is displayed on the screen to show the location of the annotation. The icon may be tapped to show the note/picture. Notes and pictures are saved in the Signal Map log with the time stamp that they were created and can be viewed in NEON Command.