Pairing
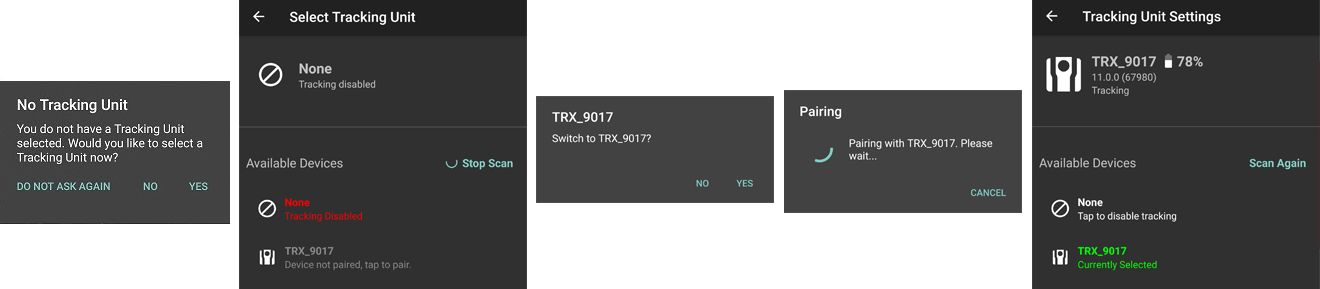
Pairing the Tracking Unit to the Android device is the first step with using NEON. If there is no Tracking Unit selected when the app starts up, the pairing wizard will prompt the user to select a Tracking Unit. Tracking Units can also be paired using a Bluetooth Scan or NFC.
Note: The status indicator at the top of the screen indicates that tracking is disabled until a Tracking Unit is selected.
![]()
Pairing Wizard
The following sequence shows the progression through the pairing wizard. At the end of the wizard, a Tracking Unit will be selected and it will return the user to the main map screen.
Bluetooth Scan
To access the Tracking Unit Settings pages, open the navigation menu by swiping from the left in the app. The text next to the icon will either say “Tracking Disabled” if not currently tracking or will display the name of the selected Tracking Unit. The user can tap on the Tracking Unit icon to access the settings. NEON will automatically scan for any nearby NEON Tracking Units.
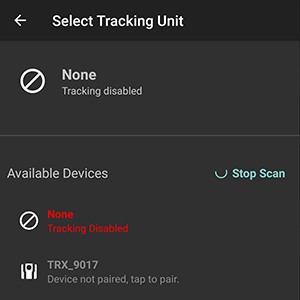
The NEON Tracking Unit is discoverable for the first two minutes that it is powered on. It can be powered on by holding down the power button until the top LED shows a solid green light. During this time, the NEON Tracking Unit’s four-digit serial number be displayed in a list of available Tracking Units.
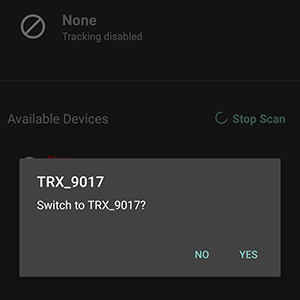
Tap on the Tracking Unit serial number to pair. A prompt is displayed to verify the Tracking Unit selection. Tap “YES” to continue.
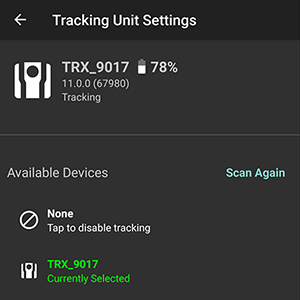
NEON will then automatically pair and connect to it. When this is successful, the top LED on the Tracking Unit will blink blue and the settings page will update as below.
NOTE: If the Tracking Unit did not show up in the list after a Bluetooth scan, try power cycling the Tracking Unit, then tap on “Scan Again”.
NFC
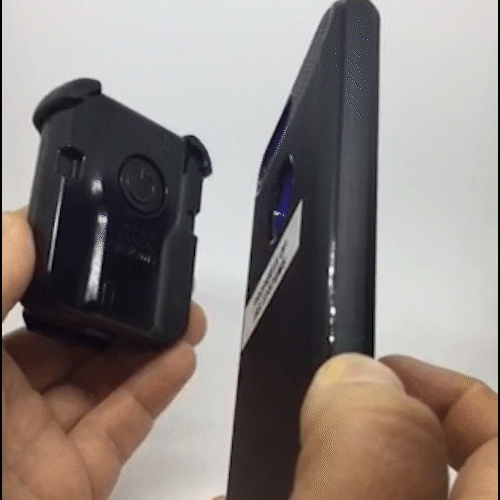
The NEON Tracking Unit contains an NFC antenna and it can be used to pair with an Android device running Personnel Tracker. In order for this to work, NFC must be enabled in the Android settings. When the NFC antenna on the Android touches the Android antenna on the NEON Tracking Unit, the devices will automatically pair and connect. The NFC antenna is located behind the TRX logo on the Tracking Unit. The NEON Tracking Unit’s LED blinks dark blue when it is paired and connected to an Android device running NEON.
Troubleshooting Tips
If you have difficulty pairing, you should ensure bluetooth is turned on on your Android device, note the charge level of the tracking unit, and ensure that no other tracking unit is connected.
If bluetooth is on and the tracking unit is currently selected in the “Available Devices” list, you may see a pop-up that reads, “No tracking unit is selected, would you like to begin tracking anyway?” You should tap “Yes.” The tracking unit currently selected will pair with the device and you may begin using the application.
Sometimes the tracking unit may not successfully pair and may get stuck on the pairing screen. If this happens, press “Cancel” and when prompted, you will see a pop-up that reads, “No tracking unit is selected, would you like to begin tracking anyway?” You should tap “Yes.” The tracking unit currently selected will successfully pair with the device and you may begin using the application.
Otherwise, if there is another tracking unit selected, under Tracking Unit Settings, select “None.” If there is no other tracking unit connected, try power cycling your tracking unit and tap “Scan Again.”