User Constraints
User constraints can be used to improve location results by constraining the NEON Location Service’s estimate to a known location. The page below details how to add an action button to the main screen that allows the user to check-in.
Update Layout
In order to perform user corrections, let’s add two action buttons. One button will start the check-in process, which will show a pin on the screen and allow the user to center it on a location. The second will be a confirmation button that will apply the check-in. These can be added to the layout in activity_maps.xml. We can place both of these buttons above another action button, the “center on location” button, that will center the map at the current location of the user.
We’ll also need to modify our layout so that we can overlay a pin icon on top of the map. We add a CoordinatorLayout, an ImageView with the pin, a FrameLayout with the two action buttons, and another action button for the “center on location” button. The images ic_marker.png, ic_persion_pin_circle_black.xml, ic_check.xml, ic_location_fixed.png, and ic_location_not_fixed.png are placed in our res/drawable folder (these images are in the sample project on Github). The changes to the layout file are shown below.
<android.support.design.widget.CoordinatorLayout xmlns:android="http://schemas.android.com/apk/res/android"
    xmlns:app="http://schemas.android.com/apk/res-auto"
    android:id="@+id/coordinator_layout"
    android:layout_width="match_parent"
    android:layout_height="match_parent"
    android:orientation="vertical">

<fragment xmlns:android="http://schemas.android.com/apk/res/android"
    xmlns:map="http://schemas.android.com/apk/res-auto"
    xmlns:tools="http://schemas.android.com/tools"
    android:id="@+id/map"
    android:name="com.google.android.gms.maps.SupportMapFragment"
    android:layout_width="match_parent"
    android:layout_height="match_parent"
    tools:context="com.trxsystems.neon.neonsampleapp.MapsActivity" />

    <ImageView
        android:id="@+id/image_user_correct"
        android:layout_width="20dp"
        android:layout_height="35dp"
        android:layout_alignParentStart="false"
        android:layout_gravity="center"
        android:layout_marginBottom="35dp"
        android:adjustViewBounds="false"
        android:cropToPadding="false"
        android:scaleType="fitXY"
        android:src="@drawable/ic_marker"
        android:visibility="invisible" />

        <FrameLayout
        android:layout_width="wrap_content"
        android:layout_height="wrap_content"
        app:layout_anchor="@id/centerButton"
        app:layout_anchorGravity="top|end">

        <android.support.design.widget.FloatingActionButton
            android:id="@+id/acceptButton"
            android:layout_width="wrap_content"
            android:layout_height="wrap_content"
            app:backgroundTint="#00cc0e"
            android:layout_marginEnd="10dp"
            android:layout_marginBottom="100dp"
            android:src="@drawable/ic_check"
            android:visibility="gone"
            />

        <android.support.design.widget.FloatingActionButton
            android:id="@+id/checkInButton"
            android:layout_width="wrap_content"
            android:layout_height="wrap_content"
            android:layout_gravity="end"
            android:layout_marginEnd="10dp"
            android:layout_marginBottom="100dp"
            android:src="@drawable/ic_person_pin_circle_black"
            app:backgroundTint="#ffffff" />

    </FrameLayout>

    <android.support.design.widget.FloatingActionButton
        android:id="@+id/centerButton"
        android:layout_width="wrap_content"
        android:layout_height="wrap_content"
        android:layout_gravity="bottom|end"
        android:layout_margin="10dp"
        android:baselineAlignBottom="true"
        android:src="@drawable/ic_location_fixed"
        app:backgroundTint="@android:color/background_light"
        app:fabSize="normal" />

</android.support.design.widget.CoordinatorLayout>
You will need to add a line to your app’s build.gradle dependencies to reference the android support design library as shown below.
implementation 'com.android.support:design:26.1.0'
After adding that line, you will need to resync your gradle file to access the coordinator layout.
Update Activity
In our activity, we can add onClick listeners to all three of our buttons, along with a boolean to indicate our current check-in state and whether we are currently following the user:
public boolean isFollowing = true;
private boolean isCorrectingLocation = false;

public FloatingActionButton centerOnLocationButton;
public FloatingActionButton checkInButton;
public FloatingActionButton acceptButton;

@Override
protected void onCreate(Bundle savedInstanceState)
{
    super.onCreate(savedInstanceState);
    setContentView(R.layout.activity_maps);

    if (getSupportActionBar() != null)
    {
        getSupportActionBar().setDisplayShowHomeEnabled(true);
        getSupportActionBar().show();
    }

    centerOnLocationButton = findViewById(R.id.centerButton);
    centerOnLocationButton.setOnClickListener(new View.OnClickListener() {
        @Override
        public void onClick(View v) {
            isFollowing = !isFollowing;
            if (isFollowing)
                centerOnLocationButton.setImageResource(R.drawable.ic_location_fixed);
            else
                centerOnLocationButton.setImageResource(R.drawable.ic_location_not_fixed);
        }
    });

    checkInButton = findViewById(R.id.checkInButton);
    checkInButton.setOnClickListener(new View.OnClickListener() {
        @Override
        public void onClick(View v) {
            if(!isCorrectingLocation)
            {
                isCorrectingLocation = true;
                checkInButton.hide();
                acceptButton.show();
                findViewById(R.id.image_user_correct).setVisibility(View.VISIBLE);
            }
        }
    });


    acceptButton = findViewById(R.id.acceptButton);
    acceptButton.setOnClickListener(new View.OnClickListener() {
        @Override
        public void onClick(View v) {
            if(isCorrectingLocation)
            {
                isCorrectingLocation = false;
                checkInButton.show();
                acceptButton.hide();
                findViewById(R.id.image_user_correct).setVisibility(View.GONE);

                //get latitude and longitude of correction
                LatLng target = new LatLng(googleMap.getCameraPosition().target.latitude, googleMap.getCameraPosition().target.longitude);

                NeonConstraint.addUserCheckin(System.currentTimeMills(), target.latitude, target.longitude, 1.0f, ElevationInfo.None());
            }
        }
    });
}
This code will toggle the isFollowing state (and switch the graphic to indicate whether it is enabled) when the centerOnLocationButton is pressed. The checkInButton will start out visible while the acceptButton is hidden. If the checkInButton is pressed, the app will enter check-in mode. A pin will appear in the center of the screen and the checkInButton will be hidden and the green checkmark to confirm the current location will be shown. The user can center the pin on the desired location, then press the green checkmark to confirm and apply a correction at the center of the screen using NeonConstraint.addUserCheckin().
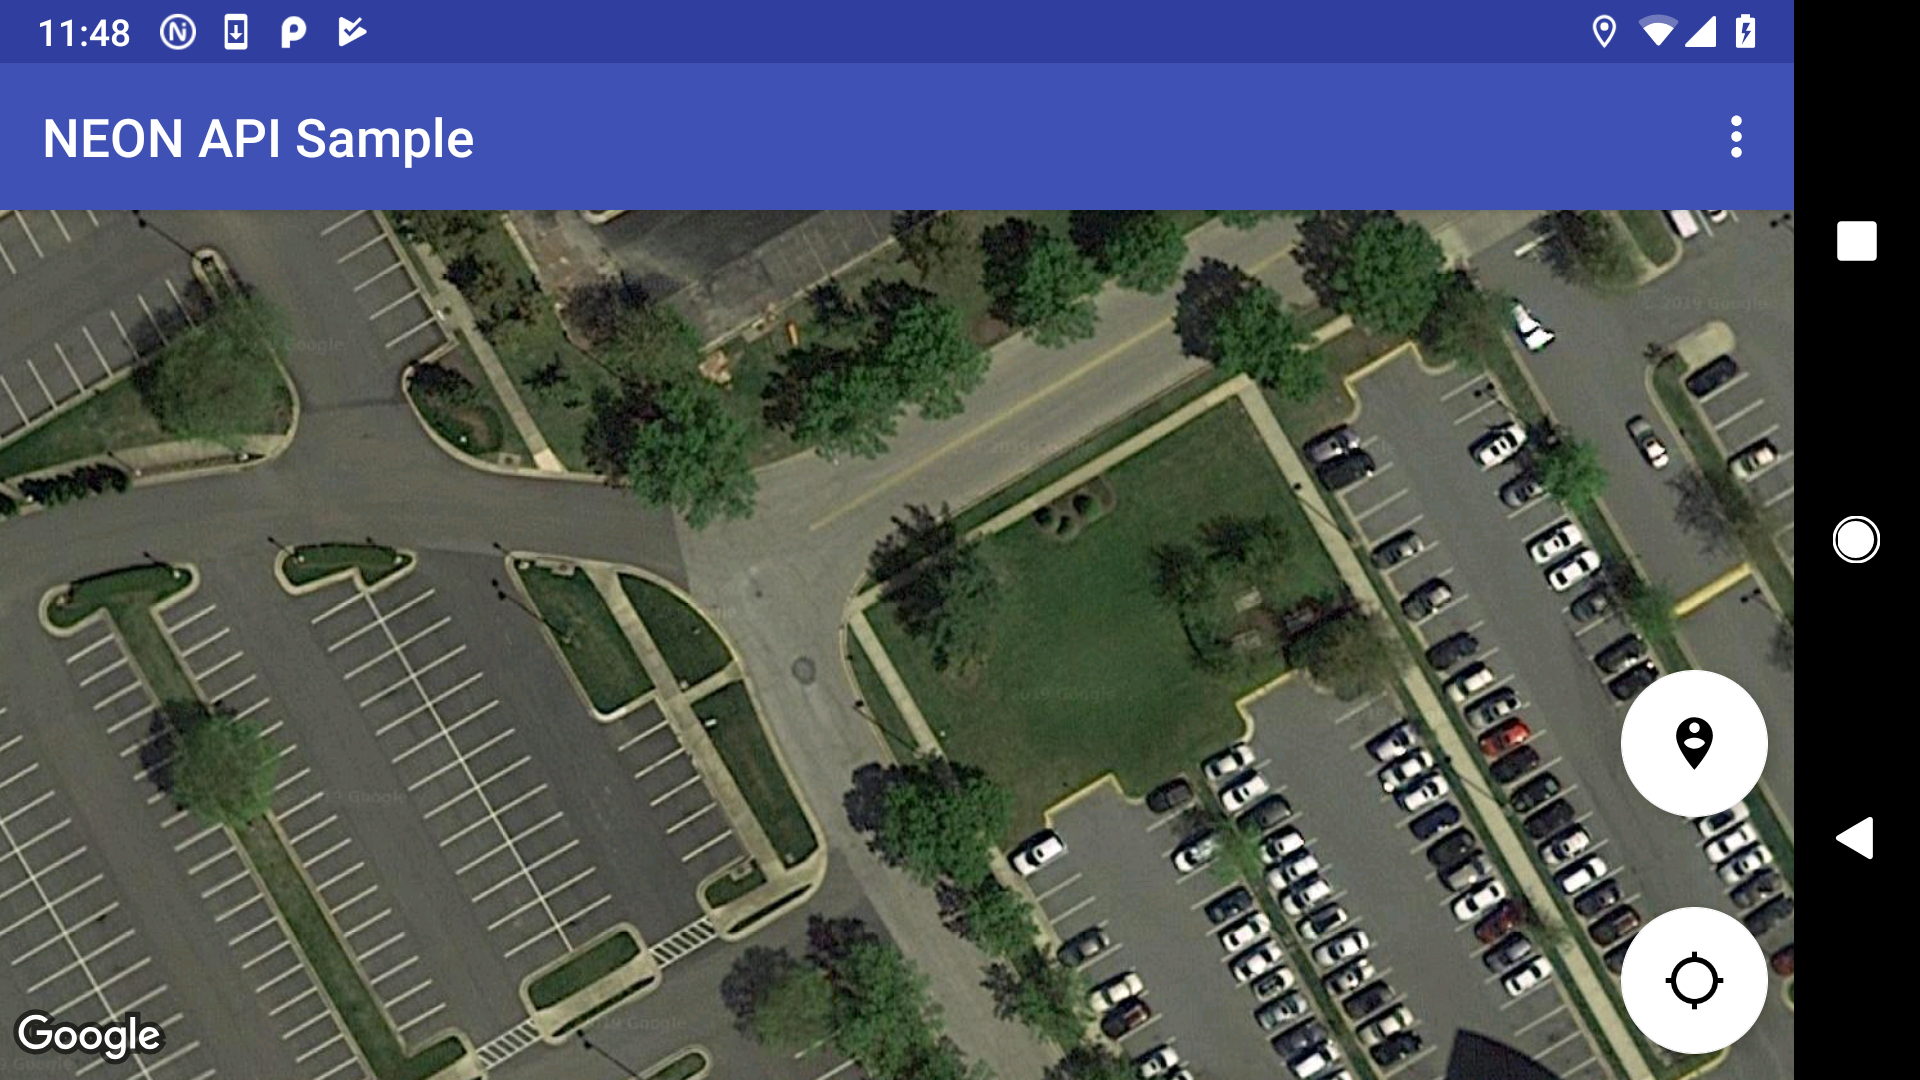
Follow-on and Check-in buttons on the map display:
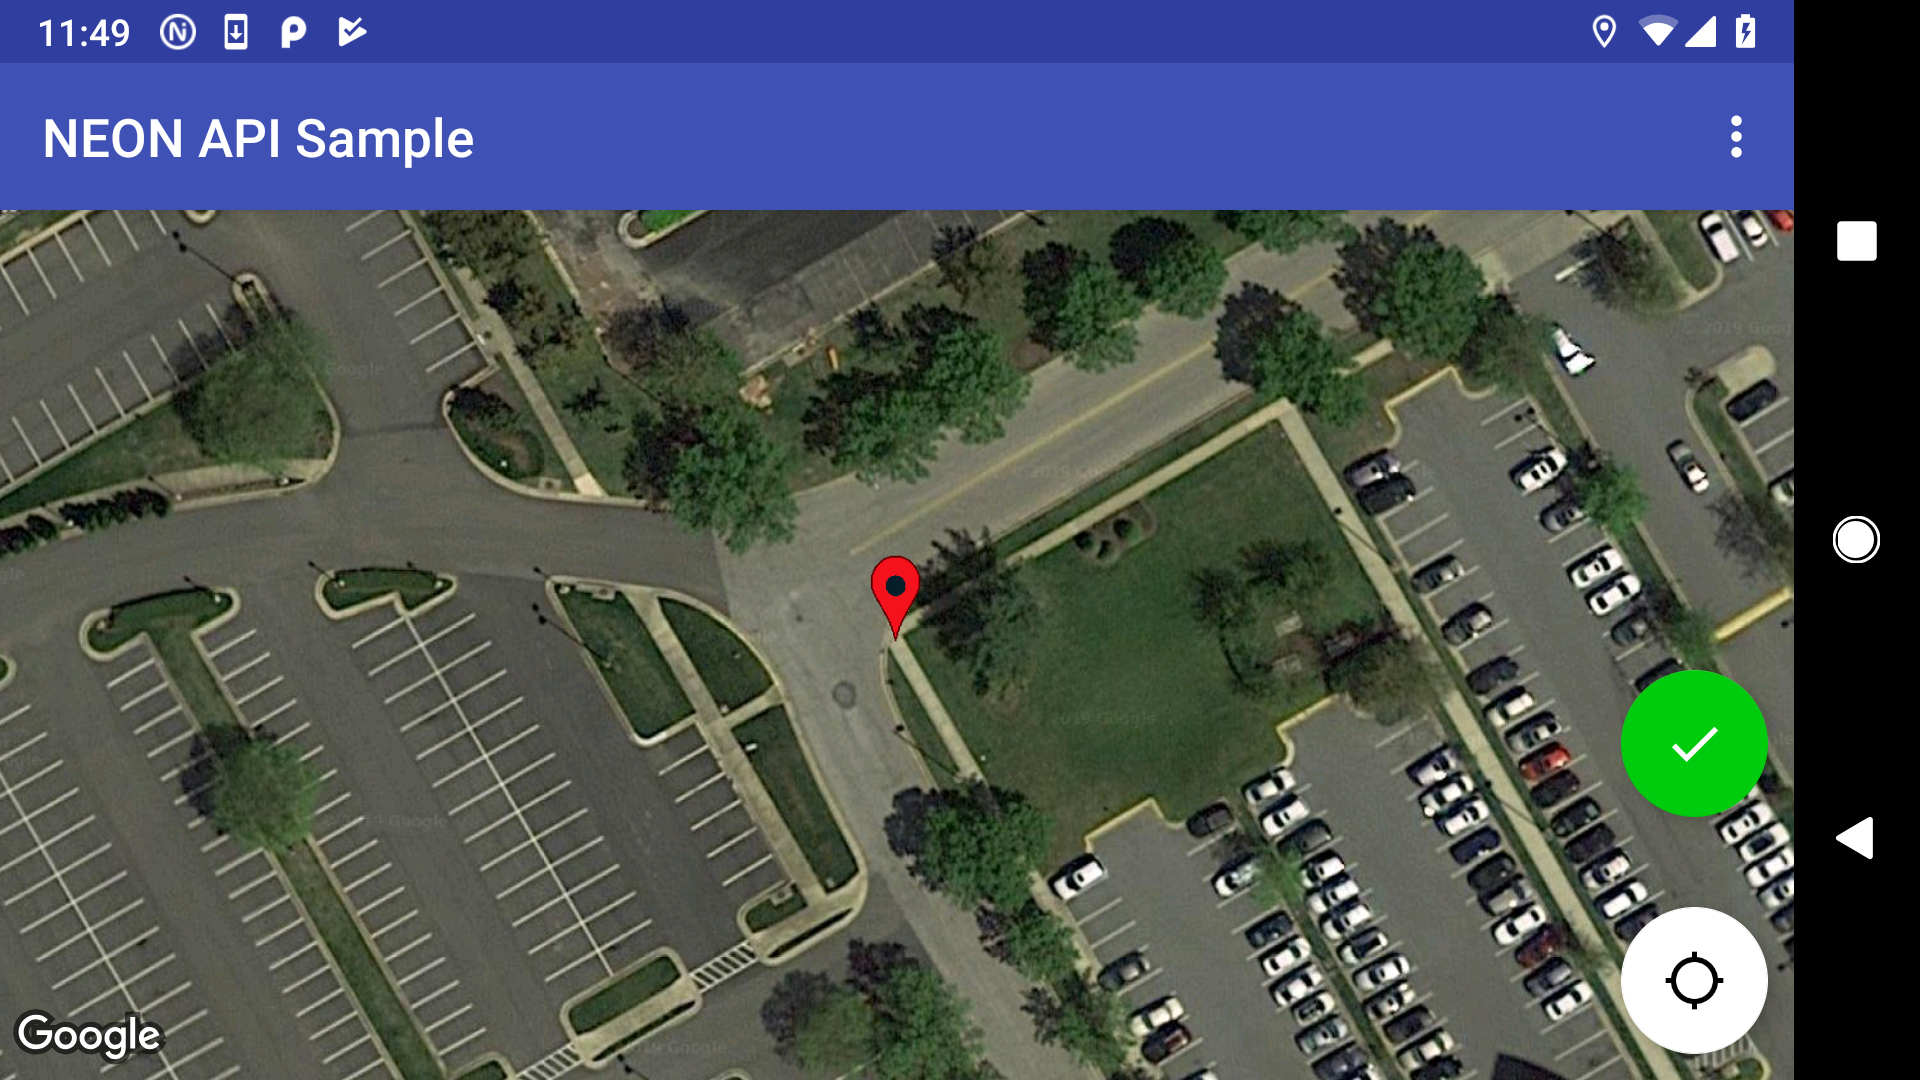
Check-in mode with center pin and green confirm button:
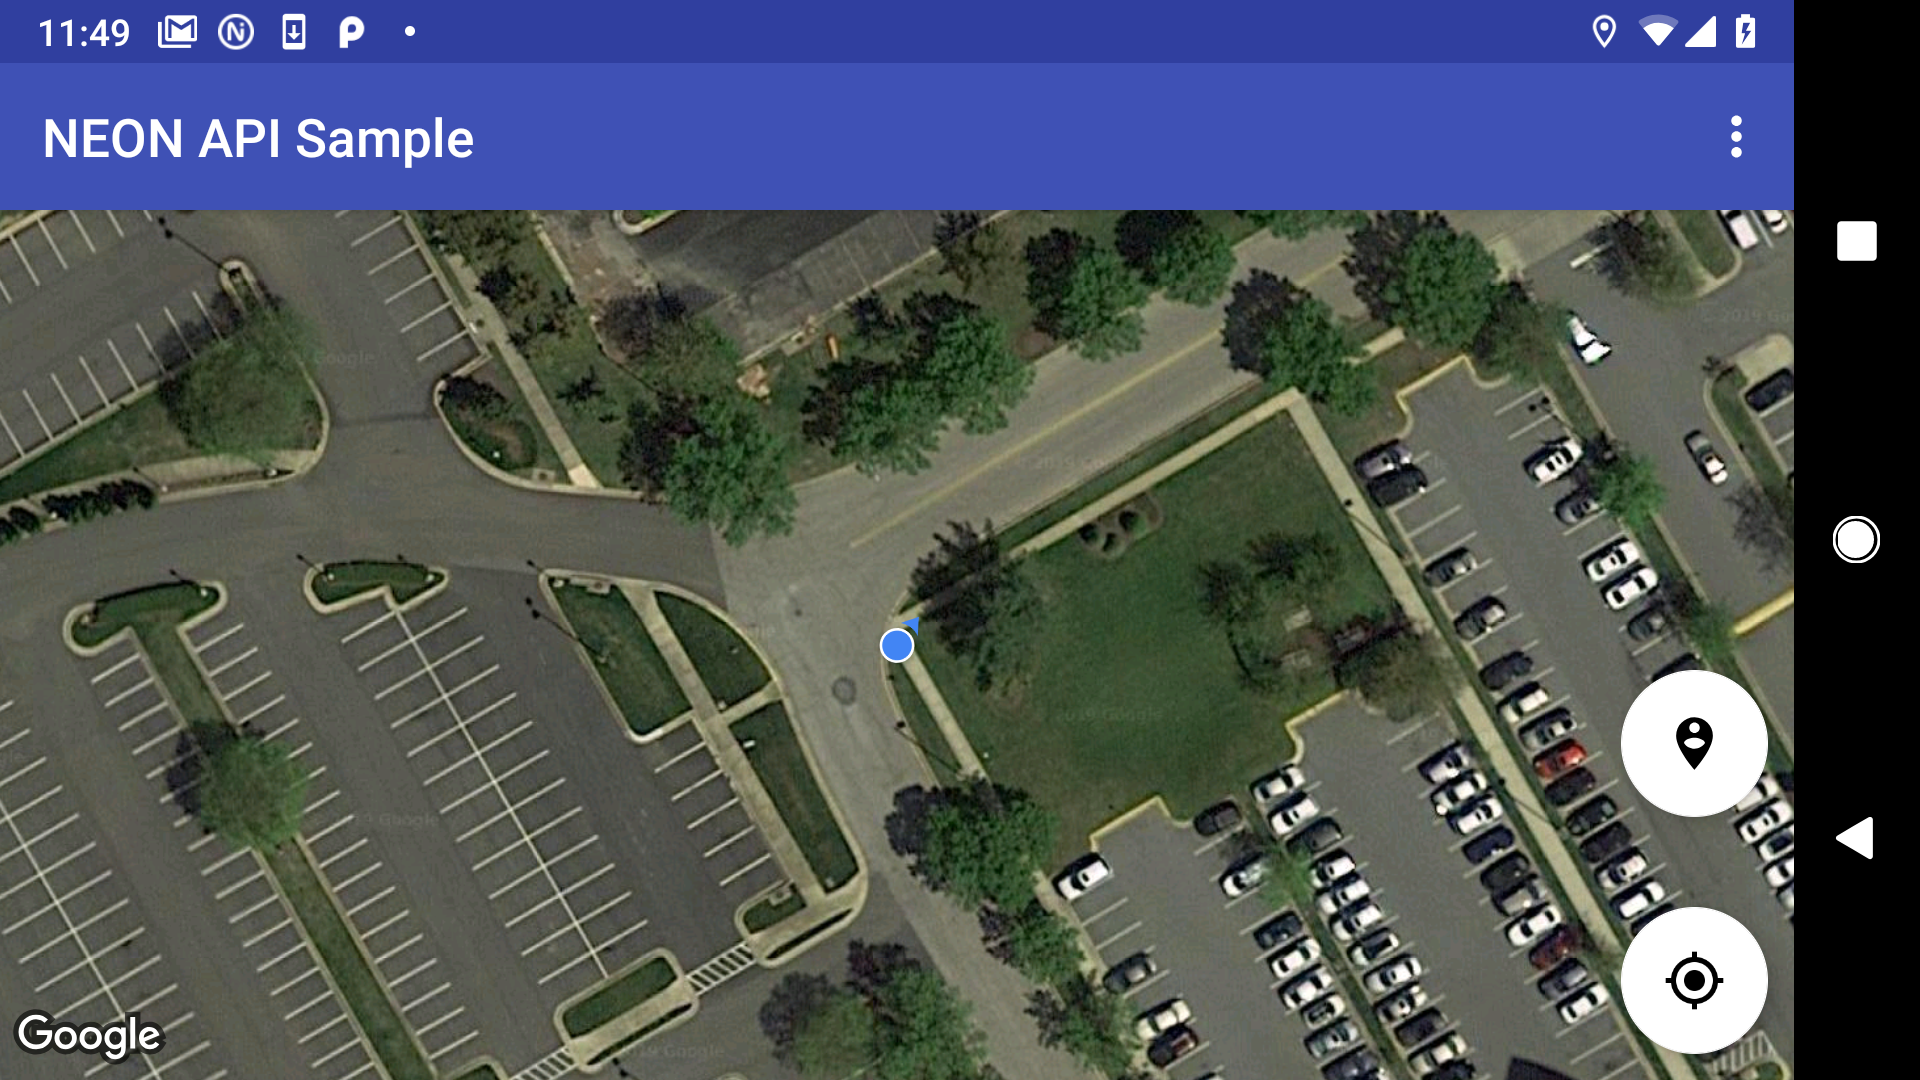
Position moves to check-in location and follow-on is enabled: