Get Building & Floor
Displaying Building and Floor Based on Location
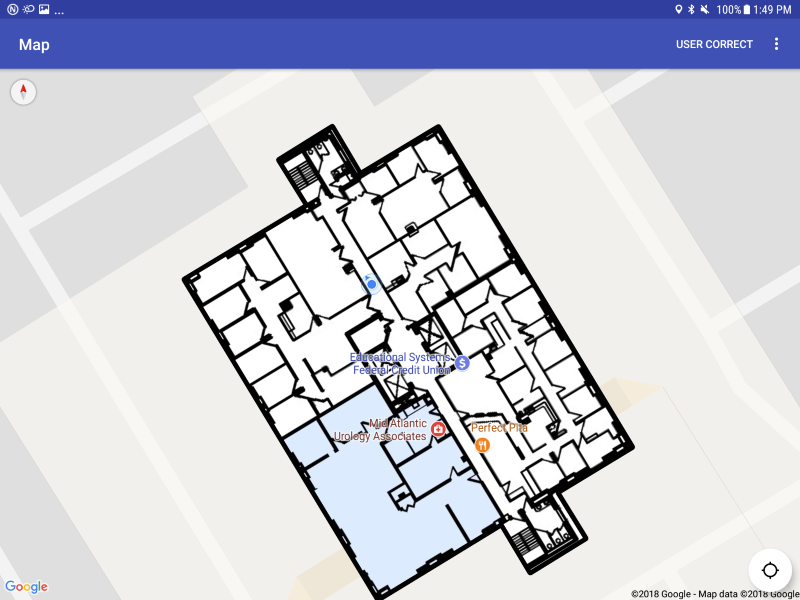
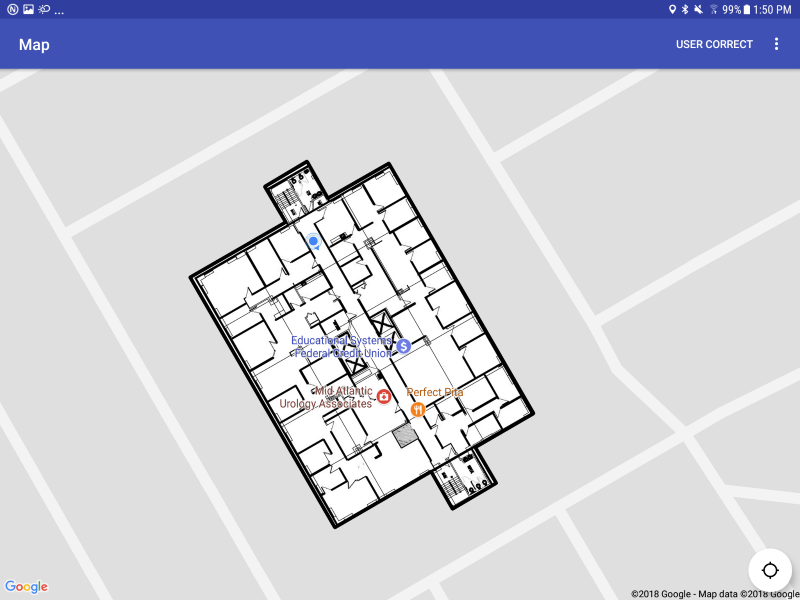
The last piece of functionality in this sample application is to implement a “follow” mode that will display the proper building and floor and change it as you transition to other floors and even outside to other buildings. The NEON Location Service will provide you with a NeonLocation that includes a building and floor number. You can use this information to display the proper floorplan on the screen as you change floors and even buildings.
The first thing we want to do is override the Google Maps sample “Center on location” button with our own that will toggle on and off the “Follow” mode.
Let’s add two images to our res/drawable folder, a center on button with “follow” enabled and “follow disabled.” Next, let’s add a floating action button in our res/layout/activity_maps.xml like this:
<android.support.design.widget.CoordinatorLayout xmlns:android="http://schemas.android.com/apk/res/android"
    xmlns:app="http://schemas.android.com/apk/res-auto"
    android:id="@+id/coordinator_layout"
    android:layout_width="match_parent"
    android:layout_height="match_parent"
    android:orientation="vertical">

    <fragment xmlns:android="http://schemas.android.com/apk/res/android"
        xmlns:tools="http://schemas.android.com/tools"
        android:id="@+id/map"
        android:name="com.google.android.gms.maps.SupportMapFragment"
        android:layout_width="match_parent"
        android:layout_height="match_parent"
        android:configChanges="orientation|screenSize"
        tools:context="com.trx.app2dmaps.MapsActivity" />

    <android.support.design.widget.FloatingActionButton
        android:id="@+id/map_fab"
        android:layout_width="wrap_content"
        android:layout_height="wrap_content"
        android:layout_gravity="bottom|end"
        android:layout_margin="10dp"
        android:src="@drawable/ic_location_fixed"
        app:backgroundTint="@android:color/background_light"
        app:fabSize="normal" />

    <ImageView
        android:id="@+id/image_user_correct"
        android:layout_width="20dp"
        android:layout_height="35dp"
        android:layout_gravity="center"
        android:src="@drawable/ic_marker"
        android:layout_marginBottom="35dp"
        android:visibility="invisible"
        android:scaleType="fitXY"/>

</android.support.design.widget.CoordinatorLayout>
In our onCreate, back in MapsActivity, let’s create this button and toggle between the two states when its clicked on:
 private boolean isFollowing = false;
 private FloatingActionButton centerOnLocationButton;   // toggle for center on location

 @Override
protected void onCreate(Bundle savedInstanceState) {
    super.onCreate(savedInstanceState);
    setContentView(R.layout.activity_maps);

    if (getSupportActionBar() != null) {
        getSupportActionBar().setDisplayShowHomeEnabled(true);
        getSupportActionBar().show();
    }

    centerOnLocationButton = (FloatingActionButton) findViewById(R.id.map_fab);
    centerOnLocationButton.setOnClickListener(new View.OnClickListener() {
        @Override
        public void onClick(View v) {
            isFollowing = !isFollowing;
            if (isFollowing)
                centerOnLocationButton.setImageResource(R.drawable.ic_location_fixed);
            else
                centerOnLocationButton.setImageResource(R.drawable.ic_location_not_fixed);
        }
    });

    // Obtain the SupportMapFragment and get notified when the map is ready to be used.
    SupportMapFragment mapFragment = (SupportMapFragment) getSupportFragmentManager()
            .findFragmentById(R.id.map);
    mapFragment.getMapAsync(this);

    /*
        * Create a new background thread, call Looper.prepare() so it
        * can handle posts, and grab a dataHandler for loading
        * buildings and floor plan images
        */
    Thread t = new Thread(new Runnable() {
        public void run() {
            Looper.prepare();
            dataLooper = Looper.myLooper();
            dataHandler = new Handler(dataLooper);
            Looper.loop();
        }
    });
    t.start();
}


/**
    * Centers and zooms the screen to the user's current location, animates over 1 second time-span
    */
private void centerOnLocation(NeonLocation location) {

    if(location == null)
        return;

    CameraPosition cameraPosition = new CameraPosition.Builder()
            .zoom(19)
            .target(new LatLng(location.latitude, location.longitude))
            .build();

    mMap.animateCamera(CameraUpdateFactory.newCameraPosition(cameraPosition), 1000, null);
}
In our onMapReady function, let’s disable the MyLocationButton which we’ve replaced, and add an setOnCameraMoveStartedListener that will turn “follow” mode off if you drag the screen.
 @Override
    public void onMapReady(GoogleMap googleMap) {
        mMap = googleMap;

        mMap.setLocationSource(locationSource);
        mMap.setMyLocationEnabled(true);
        mMap.setOnPolygonClickListener(onPolygonClickListener);
        mMap.getUiSettings().setMyLocationButtonEnabled(false);

        // sets camera move listener to track if user dragged map to stop following
        mMap.setOnCameraMoveStartedListener(new GoogleMap.OnCameraMoveStartedListener() {
            @Override
            public void onCameraMoveStarted(int i) {
                // if camera moved because of user then stop following
                if (i == GoogleMap.OnCameraMoveStartedListener.REASON_GESTURE) {
                    isFollowing = false;
                    centerOnLocationButton.setImageResource(R.drawable.ic_location_not_fixed);
                }
            }
        });
    }
The last step is to add code to our onLocationChanged() that will check if the location coming from NEON Location Service has a building and floor. If so, if “follow” is enabled, it will switch to that floorplan if it is not already.
@Override
public void onLocationChanged(NeonLocation neonLocation) {
    Log.i("NEONSampleApp", "Got a location: "+neonLocation.toString());

    if (locationListener != null)
        locationListener.onLocationChanged(neonLocation.toLocation());

    if (isFollowing) {
        // if follow-mode on, center user location
        centerOnLocation(neonLocation);

        //if user has a building and floor, draw that to the map if not displayed
        if (neonLocation.structureID != null && neonLocation.getNearestFloor() != null) {
            //get building that user is in
            final NeonBuilding building = NeonEnvironment.getBuilding(neonLocation.structureID);

            if (building == null)
                return;

            final int userOnFloor = neonLocation.getNearestFloor();

            //if a different floor than the user is on is selected, switch floor display on map
            if (buildingHashMap.containsKey(building.getID()) && buildingHashMap.get(building.getID()).floor != userOnFloor) {
                final BuildingOverlays bo = buildingHashMap.get(building.getID());
                final NeonBuildingFloor previousFloor = bo.building.getFloor(bo.floor);
                final NeonBuildingFloor newFloor = bo.building.getFloor(userOnFloor);

                Log.i("MapsActivity", "user is on floor: " + newFloor.getLabel());

                //if the floor is unchanged, do nothing
                if (previousFloor.getFloorNumber() == newFloor.getFloorNumber())
                    return;

                //remove the current outlines drawn to the map
                for (Polygon p : bo.outlines)
                    p.remove();

                //if there was an image drawn, remove that as well
                if (previousFloor.hasFloorPlan() && floorPlanMap.containsKey(previousFloor.getFloorPlanImageID()))
                    floorPlanMap.get(previousFloor.getFloorPlanImageID()).remove();

                //draw the new outline
                runOnUiThread(new Runnable() {
                    @Override
                    public void run() {
                        drawOutline(bo.building, newFloor);
                    }
                });

                //download the new floorplan, if it exists
                if (newFloor.hasFloorPlan())
                    NeonEnvironment.downloadFloorPlan(getApplicationContext(), newFloor, dataHandler, this);

            }
        }
    }
}
We should be able to try this by walking around a building. In order to initialize ourselves in a building, the standard technique is to check in to fix your position, then walk along a straight line for 10 or 20 meters, then check in again to fix your heading. You could accomplish the same effect by walking around outside with good GPS. Once your location and heading is tracking you accurately, take the stairs or elevator to another floor of the building with “follow” mode enabled. As the NEON Location Service detects you’ve left the floor, your sample application will automatically switch the floorplan to match the new floor you’re on. You can even leave the current building and walk into another building, and the floor numbers in that building should let you automatically transition floors.


